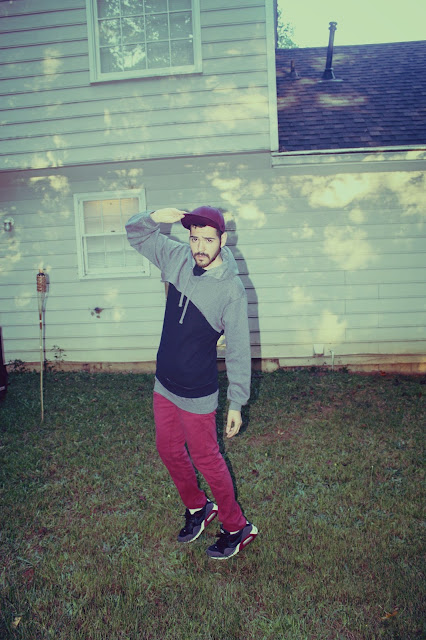
Friday, September 27, 2013

Givenchy Inspired Hoodie

A few months ago I saw a Givenchy hoodie that I loved but sadly at 835 dollars I can't afford it. So what's a chica to do when you want something you can't afford? Make your own! 


The original hoodie can be found on http://www.ssense.com here are some refrence pictures: 


Now for my version:

                                            Grey Hoodie                      Black Pullover


It took a little bit of trial and error making this but overall I'm pleased to say I made it, I really like it and at 18 dollars total to make I can't complain! <3 


Hope you enjoyed and you get some fun ideas for your own fall wardrobe! 
-Luis

Tuesday, September 17, 2013

Thrifting 101 & Thrift Haul

Today I went to one of my local thrift stores so I could do a quick how-to thrifting 101 post. But to my delight I found a few things I couldn't leave behind so this post is now a Thrifting 101 with a thrifting haul! 


First some quick tips to use while shopping

The first thing I do when I get into the store is find out the color of the week. There are several tag colors and once a week they change the color of the week that means anything with that tag will be half off! Goodwill changes the color every Sunday, so the sooner you go after a color change the bigger chance that you might find things with that color tag. Some thrift stores do 50% off everything days so just ask at your local one so you can know when the best day to go would be.

As you make your way through the racks of clothes you'll notice that all the clothes are facing the same direction on the rack. Use this to your advantage while searching. When I search through racks of dress shirts I check for a few things.

1: Do I like it at first glance 2: Check the size 3: Check for stains or rips. 4: Check the brand. 
 5: Check the tag color 


The reason I check for the brand last is because you should like the item whether or not it's designer. This allows you to leave pieces with a hole or stain without feeling like you're missing out. Do note that just feeling the fabric you can tell if the shirt is of higher quality. 


When checking through blazers keep in mind that the brand tag will be on the inside so they take a little longer to go through.

When going through ties, touch is key. Expensive ties and cheap ones have a huge difference in material but checking the designer is very easy. Some do have it on the other end of the tie so check both.   
      

As you go through things if you like something, put it in your cart! don't leave it because it's a free for-all and I've lost things to someone who saw me pick something up and I put it down. Your cart might get full very quickly but that's okay because you want to make some trips to the fitting room to make sure the things fit you. Lots of things don't look great on like on the rack. Putting the item on also allows you to check for any rips and stains that you might have missed when you first picked it up. Don't ever feel bad about leaving something behind because it didn't fit or was ruined somehow. 

You can see I went in with a lot more than I actually got. 


I go from section to section looking for things, checking and double checking. Thrifting is time consuming and since you have to make sure the clothes aren't ruined taking your time is key. 


Be mindful of the prices. 
Throughout the store they have the prices for different things, but there are some things with "Special Pricing" this means they are nicer stuff and sometimes are kept behind a counter so make sure to keep an eye out for any tags on the garment. 


Remember that while finding designer items is really fun, if you don't like it there's no reason to get it! I've found a YSL blazer and Hermes tie that I didn't even notice were designer until months after buying them. Liking the pieces is the most important thing and them being designer should be a bonus not the reason you buy it. 

Other things to remember is that location does matter, but I've found great things in poorer areas. Going to a nicer area sometimes comes with nicer things, but it's always hit or miss. Don't get discouraged! I would say about 80% of the time I walk out empty handed but then some days I have great luck and find beautiful designer items. Remember that you're looking for that one gem in the piles of crap. A lot of the clothes are donated because people have worn them to death so don't get anything you won't wear. 


 THE HAUL 


 YSL Dress shirt: $4.94


Grey British Mist Trench $8.98


Camel London Fog Trench $15.50
(special priced item)


Polka Dot Burberrys $2.92
Floral Nordstrom
 $2.92
Cabralli Collection $1.46


GOOD LUCK ON YOUR QUEST FOR AFFORDABLE, VINTAGE AND LESS ENVIRONMENTAL IMPACT FASHION!! 

If you guys have any questions feel free to leave them as comments or contact me on instagram/facebook/google+ 

-Luis 

Friday, September 13, 2013

Friday the 13th

Today's post is an outfit of the day with a DIY! 


Today is Friday the 13th and with all the fashion weeks happening I felt like doing an outfit inspired by all the shots of amazing street style I've been seeing on tumblr, instagram and other various fashion websites. I've been slightly obsessed with the long shirts, layered looks and of course the trusty black! 

For the DIY I made a faux layering bandana shirt. I know that sounds a little confusing but I'll explain. It's meant to simulate the oversized long shirt under other shirts. I saw a bandana print long shirt on tumblr and needed something like it in my wardrobe. After searching online and not being able to find it I figured I'd just make myself one. What I like about the way that I made this is that I can easily wear it under any regular shirt because it's not heavy or bulky. Well enough of the rambling here is the outfit and following I'll try my best to explain how I made my faux layering shirt.

I'll list where I got the pieces I remember


Military Jacket: Thrifted 
Dress shirt: Thrifted
Combat Boots: Forever21
Clutch:DIY 
Bandana Shirt:DIY
Sunglasses: H&M
Wool Hat: Target 


DIY

For the layering Bandana you'll just need a few things and I only spent 6 dollars to make this! 

-Two Square pieces of fabric. I'm using two bandanas because they fit my body pretty well when connected together but you could do this with any similar fabric
-Two 12 inch Zippers
-Sewing machine (or I'm sure you could hand stitch this it will just take a little longer) 
-Ruler 
-Scissors 
-Safety Pins
-Sewing pins


Okay start of by figuring out how it is that you want the fabric to lay on your body and use a safety pin to secure the the two squares of fabric to each other by just the top corners. Also make sure to leave room you don't want the material too tight on your body since otherwise walking would be a bit complicated. Make sure to leave some material on the part that will be pinned to your waist. This will make pinning it to your pants much easier and you can adjust it to your body better. 

Now you can move on to attaching the zippers. It was my first time putting in a zipper in so I just followed the instructions that came with them. I went with one black and one white to add a little more fun to it. 

I pinned down the zipper where I wanted it and slowly did a line of stitching using the zipper it self as a guide of where to go. 


My first zipper application was a bit messy but since it's black tread you can't see it unless you're looking very closely so if hand stitch this you don't have to worry about it not coming out perfect.

Attaching the zipper to the other bandana gets a little tricky because you're moving around two pieces of material but once you pin it down before sewing it stays in place pretty well. Overall it's pretty self explanatory, take your time and measure to make sure you're putting it where you want it. I went with one side being a tad longer than the other. 


 Now you can just repeat the process to attach the second zipper, again measuring and making sure to measure and take your time! 


Thats pretty much it!  


After you're done putting it together it should fit a bit loose but thats where the safety pins come into play~ I used 3 pins one on each side and one right in the middle. If it's too long you can easily fold it or even tuck it into your pants. It helps keep it loose enough to sit down and move around well. 

What's great about pinning it to your pants is that you can wear it with any pants you choose and can switch it around like an accessory instead of just a shirt. it also makes it very easy to layer since you're not actually wearing another shirt and that means for some people like me less heat! so less sweating. 


Now for some close up pictures of it in action~ 


Thank you so much for reading and if my DIY was a little confusing let me know what I can do to make it better <3 It's my first time trying to explain how I did something and since I was completely winging it I'm just explaining as I did it. If you have any questions feel free to leave me a comment and I will try my best to help out. 

-Luis 

Thursday, September 12, 2013

How fashion taught me to love myself

January 25, 2010

With a title like that I’m sure people will think that it’s a bit of a stretch to say fashion taught me self love but here’s a bit of my story. A few years ago I was very overweight, at 280 pounds I was very unhealthy, depressed, unmotivated and disliked myself more than anyone could have known just by looking at me. Fashion has always been something that I used as a way to express myself. In high school I allowed music to really influence my style and it’s when I first saw how feeling good was easier when there was a layer of interesting clothing on top of me. After high school a lot changed and a very big wave of depression hit. Not going anywhere I felt stuck, unhappy and very unattractive. After getting to my biggest size of 280 pounds I decided I was done with being so unhealthy and began my weight loss quest. I lost about 25 pounds that time and for once I really began changing the way I dressed. Inspired by classic fashion and fashion blogs I began to really start spending time looking up fashion trends, learning about designers and dreaming of a future in the industry. My original goal was to become a fashion photographer; I wanted to photograph beautiful pictorials for fashion magazines. I dreamed of Vogue, traveling the world photographing breathtaking pieces of art and doing what I loved so much. As a creative person photography has always been a huge part of who I am and this was a way for me to infuse it with something that at the time had no idea would become such a huge part of my life.  


December 5, 2011


I kept with my weight loss and really started to play with my style. Being a thriftier out of necessity as a young immigrant I was completely okay with and even enjoyed the hunt of second hand items. I started collecting bowties, vintage designer ties, blazers, dress shirts even a few pairs of shoes here and there. Suddenly I began to get attention from people because of my bowties or my blazers at non-formal events and I loved it. For once I felt comfortable in my own skin because I was able to dress it up using all kinds of neat tricks to make my body look more how I wanted it to just with the right blazer or layering. For a while I was happy with my chubby size and becoming comfortable with myself even while still overweight allowed me to learn to love me. Before this I had no idea what it felt like to look in a mirror and really think “damn I look good”. Even though I'd gained some confidence with my new style I eventually decided I wanted to be able to shop carefree at more stores. Even in America where the average weight is so much higher than other countries finding fashionable clothes that fit well in bigger sizes was hard. In July of 2012 I began my new quest for a better me. On August 2012 I weighed 225 pounds one year later I’m 165 pounds. While I can’t give fashion all the credit for learning to love myself enough to take care of my body, the goals to fit into the clothes I found inspiring was a very big part of my motivation. Fashion taught me that we’re all given a body but it’s up to us to dress and treat our bodies how you want it to be seen by others but the most important thing fashion has taught me that you're only as fabulous or beautiful as you see yourself.

December 21, 2012


In my blog I hope to explore my own style while learning from the hundreds of thousands of fashion bloggers around the world.
I hope to make fantastic friendships across oceans and perhaps even inspire a few people to seek a better version of themselves, weather that involves changing your body or just your pants.

I will also be posting some of my DIY’s as I learn to use my sewing machine better and I’ve already been requested from instagram to show how I’ve made some of my favorite accessories eventually moving on to altering clothing. I look forward to reading other blogs and hope to help others find their little square in the fashion world. 

-Luis 
                                           August 2012                    July 2013